| search |
|
|---|
!!! default "Documentation"
Docs CSC is based on [_MaterialX for MkDocs_](https://jaywhj.github.io/mkdocs-materialx/){ target=_blank }. Note that some features might not be available on Docs CSC.
!!! info "Pro tip"
As the [reference documentation of MaterialX for MkDocs](https://jaywhj.github.io/mkdocs-materialx/reference/){ target=_blank } is itself implemented using MaterialX for MkDocs, you can browse it for ideas on how to present your documentation on Docs CSC. To view the Markdown source for a particular page of the documentation, click the "view" icon :material-file-eye-outline: in the top-right corner of a page (the same goes for Docs CSC, except here we currently only have the "edit" icon :material-pencil:). Additionally, you can, for example

- [Search for available icons and emojis](https://jaywhj.github.io/mkdocs-materialx/reference/icons-emojis/#search)
- See how they present the result of using a feature or a piece of configuration. For example, a [tabbed comparison of the result when changing the `align` property for images](https://jaywhj.github.io/mkdocs-materialx/reference/images/#image-alignment) (click on :material-file-eye-outline: to see the source)
- Get an idea whether some feature is available on Docs CSC by comparing the current configuration in [_properdocs.yml_](https://github.com/CSCfi/csc-user-guide/blob/master/properdocs.yml) with the [documentation on enabling a feature](https://jaywhj.github.io/mkdocs-materialx/reference/content-tabs/#configuration)
This page contains some elements that are available in Docs CSC. For example, here we have some
body text with an external link{ target=_blank }. Some of it is
boldfaced, some italicized. Some might be monospaced. Some acronyms, like HPC, are
defined automatically (see: Glossary). One small addition: Some small text.
As you can see here: in some cases external links{ target=_blank } followed by text italicized using underscores will produce unwanted results. Italicize with asterisks instead.
Now, there's even text in a blockquote. The blockquote has some filler text after an empty line. I like to imagine it's what a typewriter would dream.
Vel suscipit quia voluptates quis. Rerum sequi voluptatem in non ipsam tempora quod natus. Soluta perferendis illo saepe sint ipsa vitae provident non. Et qui quaerat et rerum libero officia omnis enim. Laboriosam autem vel vel aut quod.
Here's a reference to a footnote:1
And there's a reference to a second footnote:2
Then—as a rule—a horizontal rule:
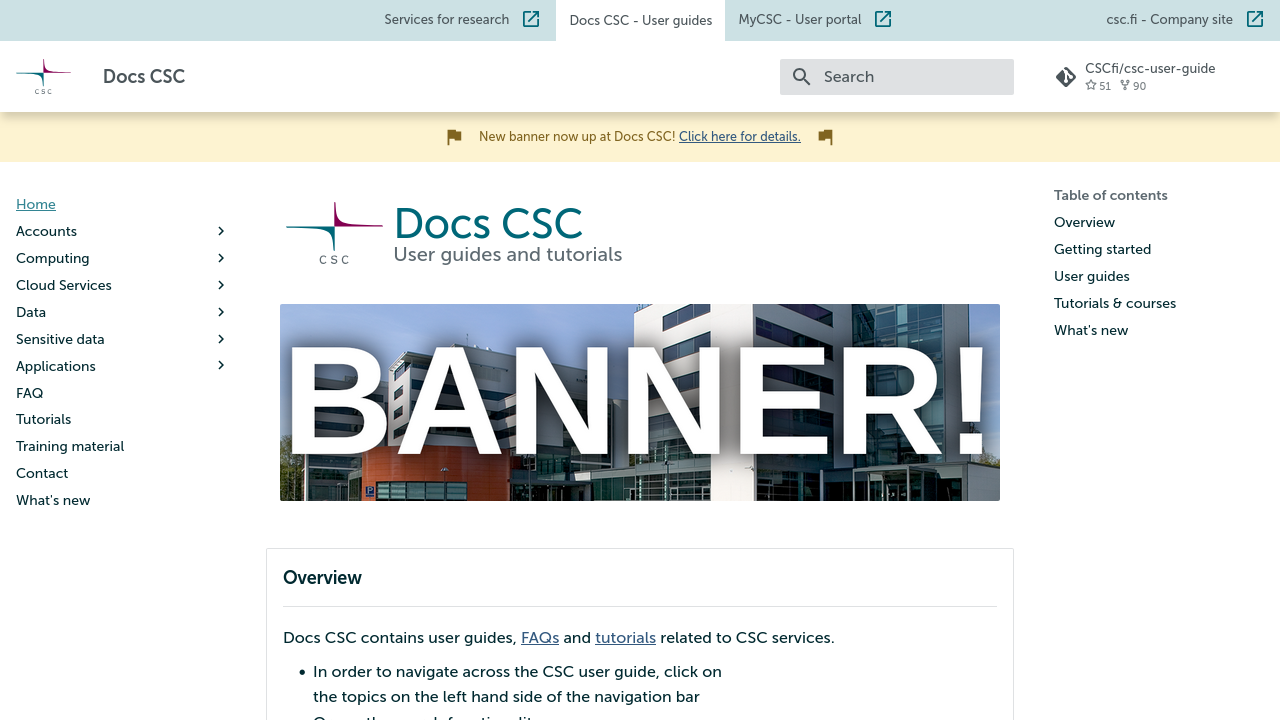
The front page can be fitted with a banner to promote a course for example. The banner is controlled via the extra.landing_banner mapping in properdocs.yml. The image file named in extra.landing_banner.image should be placed in the docs-files Allas bucket, under banners/.
path:Don't touch!image:The image filename in docs-files/banners/ Allas bucket.title:Shown, e.g. as a tooltip when pointing the image with a mouse cursor.link:The URL for more information, an enrolment page for a course etc.description:A short description of the banner rendered as alternative text. Provided mainly for accessibility, i.e. screen readers.visible:Set totrueorfalseto show or hide the banner.
=== "properdocs.yml"
```yaml
extra:
# ...
landing_banner:
path: https://a3s.fi/docs-files/banners/ # Put the image file in this bucket; Don't touch this value.
image: example-banner.png
title: Example banner now up on landing page
link: https://example.org/courses/example-course/
description: |-
Banner for upcoming example course.
Second line for example description.
visible: true
```
<div class="result" markdown>
</div>
=== "Show/hide"
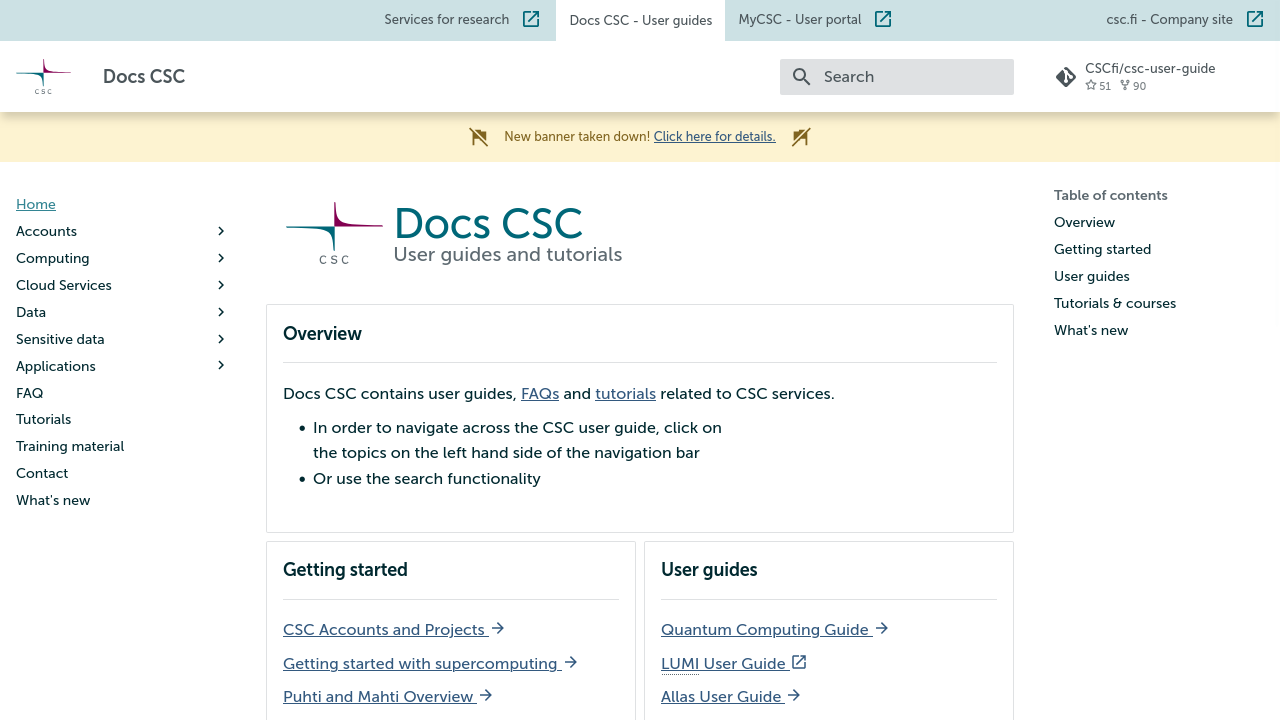
To show/hide the banner, just flip `extra.landing_banner.visible` from `false` to `true` (and _vice versa_):
```yaml
extra:
# ...
landing_banner:
# ...
visible: false
```
<div class="result" markdown>
</div>
There is a glossary of HPC-related acronyms that get highlighted automatically. For example: CPU, GPU, QPU, etc. The acronyms are defined in the markdown file includes/snippets/glossaries/hpc.md. More acronyms (case-sensitive) can be added there or into another markdown file, like so:
=== "another_glossary.md"
```markdown
*[GNU]: GNU's not Unix!
*[DFT]: 1. Discrete Fourier Transform, 2. Density Functional Theory
```
=== "properdocs.yml"
```yaml
markdown_extensions:
- ...
- pymdownx.snippets:
    base_path: includes/snippets
    auto_append:
    - glossaries/hpc.md
    - glossaries/another_glossary.md
- ...
```
The glossary is also viewable as a page at docs.csc.fi/glossary.
The heading for Headings is a heading of a heading level 2. Remember to only use one heading level 1 heading on your page and to keep the heading hierarchy intact. So no skipping levels.
Headings can also be directly linked to (see Anchors below).
### This is a heading level 3 heading

That one's a level 3. Here is some text under it.


#### Now for a level 4 heading

Some text _four_ it here.


##### Level 5 heading: `now with added monospace`

No text this time.


###### Level 6

The last one.That one's a level 3. Here is some text under it.
Some text four it here.
No text this time.
The last one.
A subheading may be attached to a heading in a heading group (<hgroup>).
<hgroup markdown>

### Heading with a subheading

This is the subheading

<hgroup>Status badges (see status-styled admonitions) listed inside a heading group are shown in a strip below the heading.
<hgroup markdown>

### Heading with status

- !!! success status "Basic"
- !!! warning status "Intermediate"
- !!! error status "Advanced"

<hgroup>- !!! success status "Basic"
- !!! warning status "Intermediate"
- !!! error status "Advanced"
<hgroup markdown>

### Heading with both

Subheading goes here

- !!! default status "And"
- !!! info status "status"
- !!! training status "here"

<hgroup>Subheading goes here
- !!! default status "And"
- !!! info status "status"
- !!! training status "here"
Text can contain annotations. (1) See MaterialX documentation for more examples. { .annotate }
- This is an annotation.
Click the :material-information-outline: icon to see the annotation: (1)
{ .annotate }

1. The annotation.- The annotation.
Ordinary Markdown link syntax works for hyperlinks. Add { target=_blank } to open a link in a new browser tab
(recommended for external links). Link to other pages in the documentation using their relative Markdown file path,
and to a specific section by appending their heading's anchor (e.g. #some-heading).
- An [external link](https://example.com){ target=_blank } (opens in a new tab)
- A link to [another page](support/glossary.md)
- A link to a [section on this page](#buttons)
- A link to a [section on another page](support/glossary.md#glossary)- An external link{ target=_blank } (opens in a new tab)
- A link to another page
- A link to a section on this page
- A link to a section on another page
Every heading automatically gets an anchor derived from its text, so ## Tables can be linked to as #tables. You can also define a custom anchor with the { #your-anchor } attribute (from the attr_list extension) and
attach it to a heading or a block of text:
This paragraph has a custom anchor, so it can be linked to
[from elsewhere on the page](#a-custom-anchor).
{ #a-custom-anchor }
This paragraph has a custom anchor, so it can be linked to from elsewhere on the page. { #a-custom-anchor }
If there are multiple headings with the same text (even with different heading levels), their anchors will have a _n suffixed to them.
For example, the headings
#### This here heading

### This here heading

## This here heading
would have the anchors
#this-here-heading#this-here-heading_1#this-here-heading_2
respectively.
!!! note inline end ""
- `./` – the current directory
- `.` – same as above, but without explicitly specifying "directory"
- `./page.md` – a file in the current directory
- `page.md` – same as above, but without explicitly specifying "in the current directory"
- `.page.md` – a file named _.page.md_ (in the current directory)
- `../` – the parent of the current directory
- `../page.md` – a file in the parent directory
- `../../` – the parent directory of the parent of the current directory
- `../../../` – and so on...
- `/` – the root directory of a filesystem, in this case the _docs/_ directory
- `/page.md` – a file in the root directory

!!! error ""
    Paths starting with `/`, i.e. _absolute paths_ are **not to be used** in links.

</small>
Links from pages nested inside the directory (aka "Folder") tree need to "climb" up their branch, using a number of ../
references, in order to reach their target page.
For example, a link on the page docs/data/sensitive-data/tutorials/vscode.md pointing to the page docs/computing/webinterface/vscode.md would need to first climb three steps up to reach docs/, and then descend down to computing/webinterface/vscode.md from there:
- Climb up to docs/ from docs/data/sensitive-data/tutorials/ with
../= docs/data/sensitive-data/../../= docs/data/../../../= docs/
- Descend down to the target page
../../../computing/webinterface/vscode.md
[VSCode in interactive web apps](../../../computing/webinterface/vscode.md)!!! warning "Attempts to climb above docs/ will just result in docs/"
That is, for the example above, while even a monstrosity like ../../../../../../../../../computing/webinterface/vscode.md would work in a preview build, it wouldn't pass the integration tests for the master branch, as MkDocs doesn't recognize such links and thus issues a warning.
For pages where the common ancestor directory is not as far up the tree as in the example above, there is no need to climb all the way up to docs/ (although it's perfectly fine to do so).
To get from docs/data/sensitive-data/tutorials/vscode.md to docs/data/moving/web-interface.md, climb two steps to docs/data/ and descend from there:
- Climb up to docs/data/ from docs/data/sensitive-data/tutorials/ with
../= docs/data/sensitive-data/../../= docs/data/
- Descend down to the target page
../../moving/web-interface.md
[Moving files using the HPC web interfaces](../../moving/web-interface.md)Markdown links may have the classes .md-button and .md-button--primary added to them to produce links that look like buttons. In the following example, the buttons have their corresponding headings/anchors (#button for ### Button and #primary-button for ### Primary button) as the link target.
#### Button

[Button](#button){ .md-button }


#### Primary button

[Primary](#primary-button){ .md-button .md-button--primary }### Unordered list
Here is an unordered list:
- It has an item
- Another item
- And a nested item
### Ordered list
Let's make an ordered list:
1. First item on the list
1. Nested item
1. Second nested item
1. Further nesting
1. The listings shall continue until nestings improve
### Definition list
The item in question
: The definition of item
**Boldfaced item**
: Another definition
`Monospaced item`
: DefinitionHere is an unordered list:
- It has an item
- Another item
- And a nested item
Let's make an ordered list:
- First item on the list
- Nested item
- Second nested item
- Further nesting
- The listings shall continue until nestings improve
The item in question : The definition of item
Boldfaced item : Another definition
Monospaced item
: Definition
You can illustrate a sequence of actions in a procedure with steps. Three types of steps are available. For more information, refer to MaterialX documentation.
<div class="steps" markdown>

1. A for ABC
1. B for the "B" in ABC
1. C for the "C" in CSC (the second one)

</div>

---

<div class="steps" markdown>

1. Start with some JavaScript

`[object Object]`

1. Done with JavaScript

And there we have it. Clean and simple.

</div>

---

<div class="steps" markdown>

### First step

One.

### Second step

Two.

### Third step

Three.

### And so on...

Five.

</div>- A for ABC
- B for the "B" in ABC
- C for the "C" in CSC (the second one)
- Start with some JavaScript
[object Object]
- Done with JavaScript
And there we have it. Clean and simple.
```python hl_lines="2 3"
# Here is a box with some syntax highlighted Python

from somewhere import some_code


NUMBER = 42
LIST = [1, 2, 'three']


class PythonClass:
    def __init__(self) -> None:
        self.__property = 'A string property'

    @property
    def property(self) -> str:
        return self.__property

    @staticmethod
    def method(parameter: int = 1) -> list[None]:
        return [None] * (parameter + NUMBER)

def main():
    string = f'Length of list is {len(LIST)}.'
    print(string)
```
# Here is a box with some syntax highlighted Python

from somewhere import some_code


NUMBER = 42
LIST = [1, 2, 'three']


class PythonClass:
    def __init__(self) -> None:
        self.__property = 'A string property'

    @property
    def property(self) -> str:
        return self.__property

    @staticmethod
    def method(parameter: int = 1) -> list[None]:
        return [None] * (parameter + NUMBER)

def main():
    string = f'Length of list is {len(LIST)}.'
    print(string)
Notice the line highlighting (on lines 2 and 3). Additionally, the code boxes can have a title:
```javascript title="looong_comment.js"
// Here's a JavaScript comment with a loooooooooooooooooooooooooooooooong line. You know, for testing purposes. Tell you what, let's make it just a bit longer still.
```
// Here's a JavaScript comment with a loooooooooooooooooooooooooooooooong line. You know, for testing purposes. Tell you what, let's make it just a bit longer still.Diff works too:
```diff
-Departing
+Arriving
```
-Departing
+Arriving
Remember to leave an empty line after the ``` in a source code box. Failing to do so can leave
any immediately following text as "loose", i.e., outside of an HTML paragraph (<p>).
See Languages at pygments.org for a complete list of supported languages. To highlight a few useful ones here:
-
Lexer for (ba|k|z|)sh Slurm scripts.
Short names: slurm, sbatch
-
Lexer for Bash shell sessions, i.e. command lines, including a prompt, interspersed with output.
Short names: console, shell-session
-
Simple lexer that highlights everything as Token.Generic.Output.
Short names: output
-
Text:
"Null" lexer, doesn’t highlight anything.
Short names: text
| This | Table | Has | Five | Columns |
|-|-|-|-|-|
| and | | | | |
| | it | | | |
| | | has | | |
| | | | five | |
| | | | | rows || This | Table | Has | Five | Columns |
|---|---|---|---|---|
| and | ||||
| it | ||||
| has | ||||
| five | ||||
| rows |
!!! default "Nothing special"

    - Type qualifier: `default`.

!!! info "Information available"

    - Type qualifier: `info`

!!! success "You've got it!"

    - Type qualifier: `success`

!!! warning "You're on thin ice!"

    - Type qualifier: `warning`

!!! error "Oopsie!"

    - Type qualifier: `error`
!!! default "Nothing special"
- Type qualifier: `default`.
!!! info "Information available"
- Type qualifier: `info`
!!! success "You've got it!"
- Type qualifier: `success`
!!! warning "You're on thin ice!"
- Type qualifier: `warning`
!!! error "Oopsie!"
- Type qualifier: `error`
???+ default "Collapsible default"

    Some content shown by default (click on title to hide).

??? default "Collapsible default (click to reveal content)"

    Some content hidden by default.

??? info "Collapsible info (click to reveal content)"

    Some content hidden by default.

??? success "Collapsible success (click to reveal content)"

    Some content hidden by default.

??? warning "Collapsible warning (click to reveal content)"

    Some content hidden by default.

??? error "Collapsible error (click to reveal content)"

    Some content hidden by default.
???+ default "Collapsible default"
Some content shown by default (click on title to hide).
??? default "Collapsible default (click to reveal content)"
Some content hidden by default.
??? info "Collapsible info (click to reveal content)"
Some content hidden by default.
??? success "Collapsible success (click to reveal content)"
Some content hidden by default.
??? warning "Collapsible warning (click to reveal content)"
Some content hidden by default.
??? error "Collapsible error (click to reveal content)"
Some content hidden by default.
!!! default ""

    - Type qualifier: `default`
    - Blank title

!!! info ""

    - Type qualifier: `info`
    - Blank title

!!! success ""

    - Type qualifier: `success`
    - Blank title

!!! warning ""

    - Type qualifier: `warning`
    - Blank title

!!! error ""

    - Type qualifier: `error`
    - Blank title
!!! default ""
- Type qualifier: `default`
- Blank title
!!! info ""
- Type qualifier: `info`
- Blank title
!!! success ""
- Type qualifier: `success`
- Blank title
!!! warning ""
- Type qualifier: `warning`
- Blank title
!!! error ""
- Type qualifier: `error`
- Blank title
!!! default status "Unknown"

!!! info status "Cool"

!!! success status "Fine"

!!! warning status "Orange"

!!! error status "Transcended"
!!! default status "Unknown"
!!! info status "Cool"
!!! success status "Fine"
!!! warning status "Orange"
!!! error status "Transcended"
!!! note "An admonition styled as a note"

    - Type qualifier: `note`
!!! note "An admonition styled as a note"
- Type qualifier: `note`
!!! note ""

    - Type qualifier: `note`
    - Blank title
!!! note ""
- Type qualifier: `note`
- Blank title
???+ note "Collapsible note"

    Some content shown by default (click on title to hide).
???+ note "Collapsible note"
Some content shown by default (click on title to hide).
??? note "Collapsible note (click to reveal content)"

    Some content hidden by default.
??? note "Collapsible note (click to reveal content)"
Some content hidden by default.
!!! training "External training material available"

    - Type qualifier: `training`
!!! training "External training material available"
- Type qualifier: `training`
???+ training "Collapsible training"

    Some content shown by default (click on title to hide).
???+ training "Collapsible training"
Some content shown by default (click on title to hide).
??? training "Collapsible training (click to reveal content)"

    Some content hidden by default.
??? training "Collapsible training (click to reveal content)"
Some content hidden by default.
!!! training ""

    - Type qualifier: `training`
    - Blank title
!!! training ""
- Type qualifier: `training`
- Blank title
!!! training status "Learning at an accelerated rate"!!! training status "Learning at an accelerated rate"
For inline admonitions, you first define the admonition as either
`inline` or `inline end`. Then, you define the content.

!!! warning inline "Hold on!"

    This script might give unexpected results!

    `warning inline "Hold on!"`

!!! info inline end ""

    Then again, it might not.

    `info inline end`


```bash
a="unexpected"
b="results"
if [ $RANDOM -eq $RANDOM ];
then
    echo $a $b
fi
```
For inline admonitions, you first define the admonition as either inline or inline end. Then,
you define the content.
!!! warning inline "Hold on!"
This script might give unexpected results!

`warning inline "Hold on!"`
!!! info inline end ""
Then again, it might not.

`info inline end`
a="unexpected"
b="results"
if [ $RANDOM -eq $RANDOM ];
then
    echo "${a} ${b}"
fi
The note admonition works pretty well at inline end with some text.
#### "Sticky note" example

!!! note inline end "Sticky note"
    In porttitor orci arcu, sed varius...

Lorem ipsum dolor sit amet, consectetur adipiscing...!!! note inline end "Sticky note" In porttitor orci arcu, sed varius augue mattis sed. Duis vestibulum vitae erat et laoreet. Praesent at urna quis tellus rhoncus molestie non ac ante.
Lorem ipsum dolor sit amet, consectetur adipiscing elit. Praesent eu sapien lorem. Aenean hendrerit sodales dictum. Duis iaculis lectus nec porta commodo. Vivamus ac iaculis risus. Donec dapibus, ipsum in aliquet malesuada, augue nisi interdum orci, at venenatis lorem ante vel ex. Integer vel libero mauris. Morbi vel mollis leo, id sagittis metus. Integer at augue at ipsum ullamcorper vehicula. Duis placerat ac velit nec ornare. Aliquam erat volutpat. Nunc id nulla nec lectus volutpat luctus. Curabitur dui odio, rutrum vel ultricies vel, tempus eu sapien. Nam euismod metus augue, ac ornare purus porta sed. Donec sed augue in erat ullamcorper ullamcorper sed vitae magna. Curabitur auctor velit quis sem blandit, ut faucibus lorem semper. Proin ante erat, finibus a bibendum non, dapibus quis mi. Praesent iaculis tortor est, in porttitor metus imperdiet sit amet. Cras malesuada fringilla odio vitae facilisis. Sed aliquam, lectus vitae gravida mattis, purus lacus accumsan ante, a molestie turpis justo vel turpis.
Images can be added by just using the Markdown syntax for an image
or with caption by wrapping it in some HTML tags like so
<figure markdown="span">
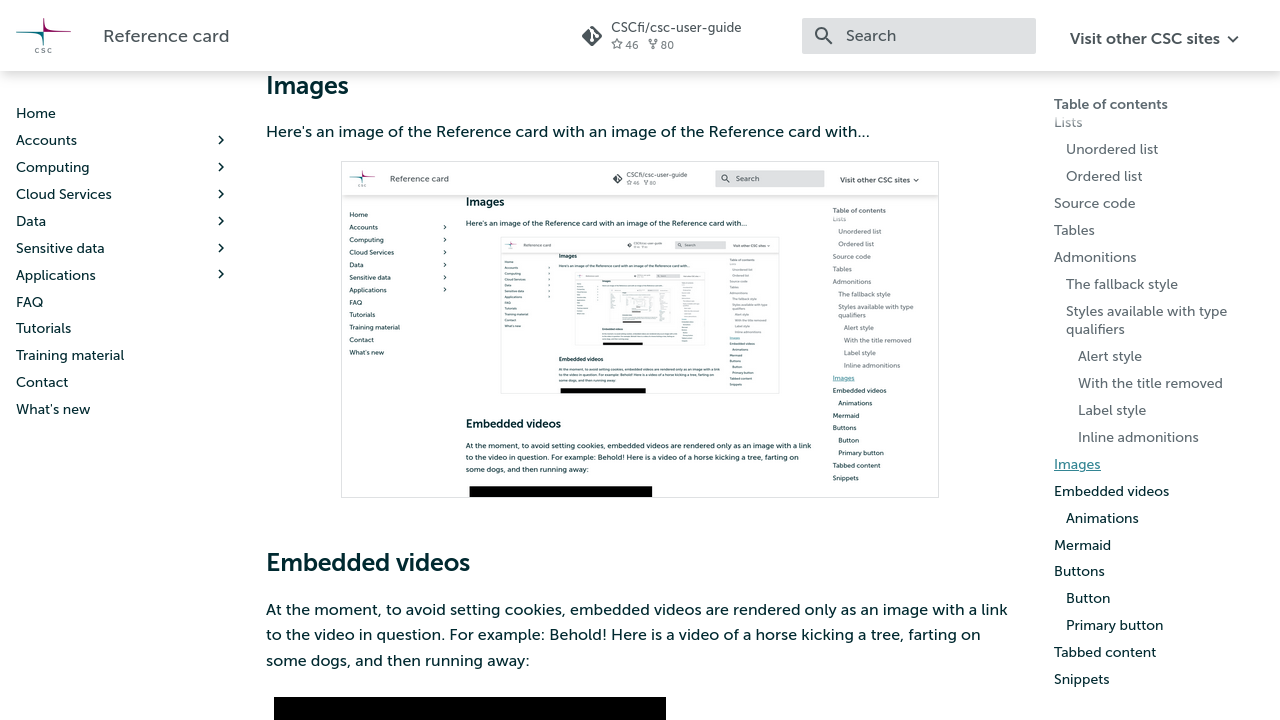
<figcaption>Here's an image of the Reference card with an image of the Reference card with...</figcaption>
</figure> Here's an image of the Reference card with an image of the Reference card with...
At the moment, to avoid setting cookies, embedded videos are rendered only as an image with a link to the video in question. For example: Behold! Here is a video of a horse kicking a tree, farting on some dogs, and then running away:
<iframe
    width="400"
    height="300"
    srcdoc="https://www.youtube.com/embed/KCzwyFHSMdY"
    title="Horse kicks tree, farts on dogs then runs away."
    frameborder="0"
    allow="accelerometer; autoplay; clipboard-write; encrypted-media; gyroscope; picture-in-picture"
    allowfullscreen
></iframe>If you don't need sound (or controls), you can use animations as an alternative for embedded videos. They are used just like static images. Both .gif and .png files work.
Documented here: https://mermaid.js.org/intro/, but for example a fenced block like this:
```mermaid
flowchart TD
    A{"`Does your
        reference card
        include a _Mermaid_
        diagram?`"}
    B(Yes, it does.)
    C([Good])

    A-->|Yes| C
    A -->|No| B
    B --> |"`What?! No, you
             can't just... Oh.`"| C
```
produces a flowchart like that:
flowchart TD
    A{"`Does your
        reference card
        include a _Mermaid_
        diagram?`"}
    B(Yes, it does.)
    C([Good])

    A-->|Yes| C
    A -->|No| B
    B --> |"`What?! No, you
             can't just... Oh.`"| C
Diagrams (including a toolbar) from draw.io can be embedded as iframes by selecting File -> Embed -> IFrame.... With line breaks added for illustration, the resulting piece of HTML could look something like this:
<iframe
  frameborder="0"
  style="width: 100%;
         height: 301px;"
  src="https://viewer.diagrams.net/?tags=blahblahblahblah%blah
       blahblahblah%blahblah%blah%blahblahblahblah%blahblah"
></iframe>
The src attribute needs to be renamed to srcdoc:
<iframe
  ...
  srcdoc="..."
  ...
></iframe>
The size can be controlled by changing the value of the style attribute. Note the units: % for width and px for height. Here's an example with a width of 100 percent and a height of 500 pixels:
<iframe frameborder="0" style="width:100%;height:500px;" srcdoc="https://viewer.diagrams.net/?tags=%7B%7D&lightbox=1&highlight=0000ff&edit=_blank&layers=1&nav=1#R%3Cmxfile%3E%3Cdiagram%20name%3D%22Page-1%22%20id%3D%22ftzXAFIqJNWyvfU7Nhta%22%3E7Zpbc9o4FMc%2FDY%2FxGN9wHgMk6UN2lllmJ7tPHWELW8W2WFmOIZ9%2BJUsy8gUwKWnSaZtkgo4uls7%2Fp%2BMjpSN7lu4eCdjGf%2BAQJiPLDHcjez6yrLFp2uwXt%2ByF5dZxhCEiKJSNDoYleoWqp7QWKIR5oyHFOKFo2zQGOMtgQBs2QAgum83WOGk%2BdQsi2DEsA5B0rc8opLGw%2Bq55sH%2BBKIrVk9mKRU0KVGNpyGMQ4lIz2fcje0YwpuJTupvBhDtP%2BUX0ezhSW0%2BMwIz2dPg7h%2BTP1TfuE8tMwIrpUjUS3RKUbUQ5ppS78o53tB5CHORGkAfGGrFSgNNtQVEW8RqUb6o2doxTeBMiwobGZC%2FGU7Pal%2BvNX8%2Fea%2Fa4%2BM83X2dP4fL5ZuzWy62XkdO9cjHBRRZCPsB4ZE%2FLGFG43IKA15YMKmaLaZrI6hS%2FgFXVk5cIzNGrXsYUUK3MaIR6GYZILyY42FQPNllBEqRVdz0snf4CCYU7zSTX9giZayj3ialqbam%2BxN9R5VKDSZpijaOafyD5jeqhDxKzD9KfqqiJfhKCRRFTxGcBV1y8jEKy5h4%2FyUZZlsaWd6wBOau8dVL4fANpEEv3axqDfCu28hrtuDzTnBK8gTOcYMKsGc4gN6r9xHuvUZKoeoaoPfXnD3worhRiu%2FkuQVHG6ijmPFWeWOAcUYS5NYDcA1rzp1aDFaYUp%2BKhWz77dBfxeGdEwdYyogSv4NcSExZbvh8ZxxqAjGOogXVq%2FHeFZrac8UCOgyJlqwOVa4YHk7Os2CdZ0fA4KxKQYteyVouYgmATVbFGA2Vd%2FTsKigBPBX6rg2II16BIaJvGEORxHVfayCCcTwzEok1uKF8yl023GFUf5iN3yr5NgwXNGdN4Zsofyx65c%2F59lcDktShz3S5lrmtMbruUeVehrPNC64XCk%2BsCSQH199exKIILymhk%2BqhsoAoOOKOa5uzrgU9hyvQIETzUycDSiiVV8%2FmxKNSQ%2BiyZ%2FZR1eNVg53OXWdHYUmW5eLMvVlYcQXL%2FIriqBmkjCMrcMYq8etZVIpZXhyOJk9eD08TvsqRsF7A0DJxJhxMYssROFjGhMY5wBpL7g3V6SEQqlOo2T5jLVHnyG6R0L%2FUABcVNsZgLyf4f3t9w7Yky%2FMtrDctV5flOPkGU9nppAQliDuDKVMaj6uS4IAE8v3MoIBGk517Rlsm9c1JrAhMW8l%2BaafHVZRt7H6rbWNeMh%2BDTkr1dHX%2BgOiJ1%2FjTy%2BBeG46HR6cirU5OoN%2Fi%2BPY8bGIhbrwLTHPv%2BvC%2BgvhYEGuK4xDp%2Bf0itUzn1evZ7Xs895wbHfSflbz86njai6ecMpf4P2qvHj%2FZelYuyM50X8Q%2FL5RdlY0PU5guy9sYVgDwhi8KAjH6sr7%2Bb0nM%2FPYnZN05%2F7U3Y3qspCkPBl3b6NzspdH%2BifAruzvasr5XkQ0b6zU3ftr0xDdN37cbWlfddg0WXgy%2F4Yg6j3DjNHni9zhmMbUjqKV01C1eXEZ9%2F97ND0odtf%2Fva279FgmTMHTdfDd5t6zwmFiR76TeIrYE812kO5LQGEivuDHRHCNhrzeS2Ozphz%2FF7J3zgVow4kOKByFoXpirXzUxaiYNr8q93yFh6z7udCNpOV1jwQAE0QvjCfuVGDEj4tbrf%2FfnuV93WZZljd%2FIkpydPclvh9HoHGPs3d78gd3VQ%2FjDunN%2Fc%2FYrcTVzD%2FWDyJj3ktQ4iC0BAklR%2FGmakwHyfU5geP5pozDK%2F0Av5k6bh54i%2BPzk2s9efjRKnlSL23MZ6PYzYb7rZP%2FwJWyRvh%2F8IYN%2F%2FDw%3D%3D%3C%2Fdiagram%3E%3C%2Fmxfile%3E"></iframe>=== "First tab"
Content can be divided into tabs. The first one is visible by default.
!!! default ""
    There can be any content, like this admonition, under tabs.
=== "Second tab"
| Tables | work | fine | too |
|-|-|-|-|
| just | as | an | example |
=== "And so on..."
It can get quite messy:
!!! warning ""

    === "Probably not what you want"
        You can even have nested tabs under admonition under tabs.

    === "But possible, nonetheless"
I would recommend against it, though.=== "First tab" Content can be divided into tabs. The first one is visible by default.
!!! default ""
There can be any content, like this admonition, under tabs.
=== "Second tab" | Tables | work | fine | too | |-|-|-|-| | just | as | an | example |
=== "And so on..." It can get quite messy:
!!! warning ""
=== "Probably not what you want"
You can even have nested tabs under admonition under tabs.
=== "But possible, nonetheless"
I would recommend against it, though.
Files under includes/snippets/ may be added as snippets on the current page.
Suppose we have two Markdown files, a.md and b.md with the content
Yes, this is _a.md_.and
Hello from _b.md_!The file ref/a.md (relative to the base path above) added as a snippet with
;--8<-- "ref/a.md"would look like this:
--8<-- "ref/a.md"
Adding ref/a.md and ref/b.md using
;--8<--
ref/a.md
ref/b.md
;--8<--
would look like this:
--8<-- ref/a.md ref/b.md --8<--
Snippets also work from inside the source code boxes. For example
```markdown
;--8<-- "ref/a.md"
```
would produce
```markdown
--8<-- "ref/a.md"
```
More examples (untested in Docs CSC) can be found in PyMdown Extensions Documentation.
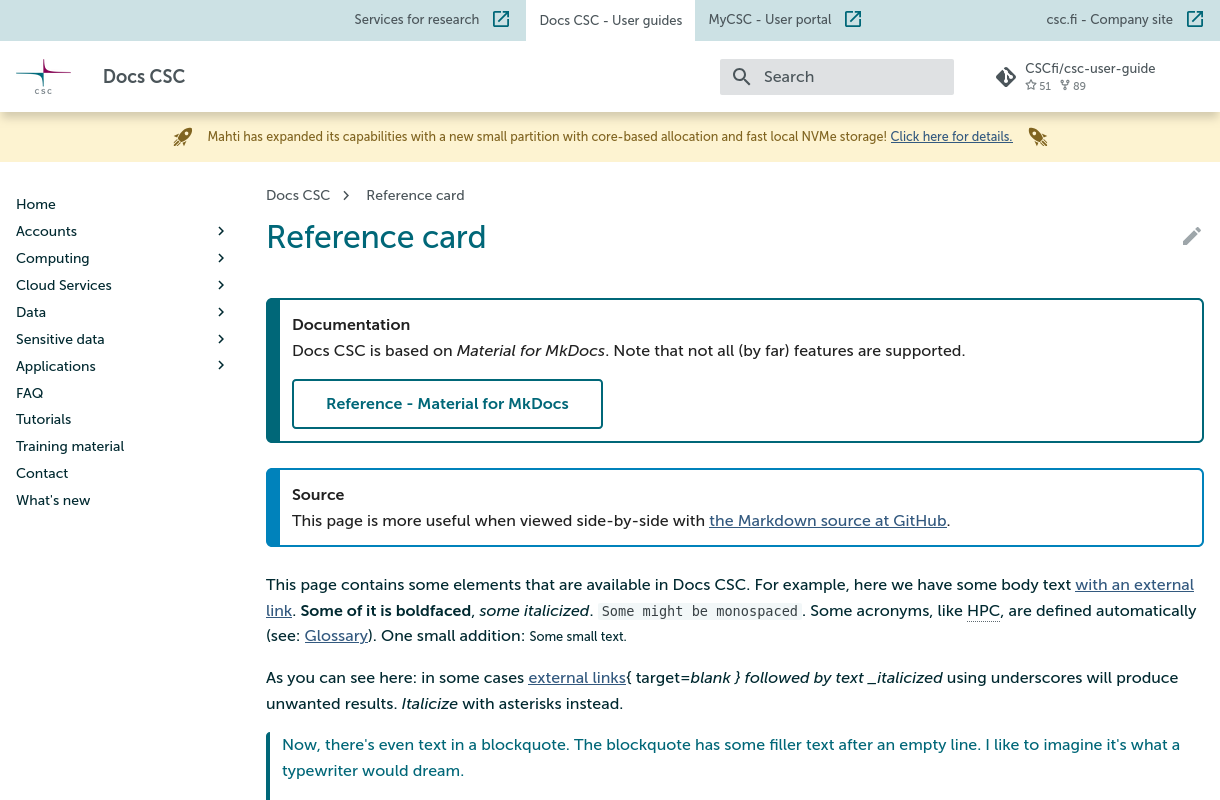
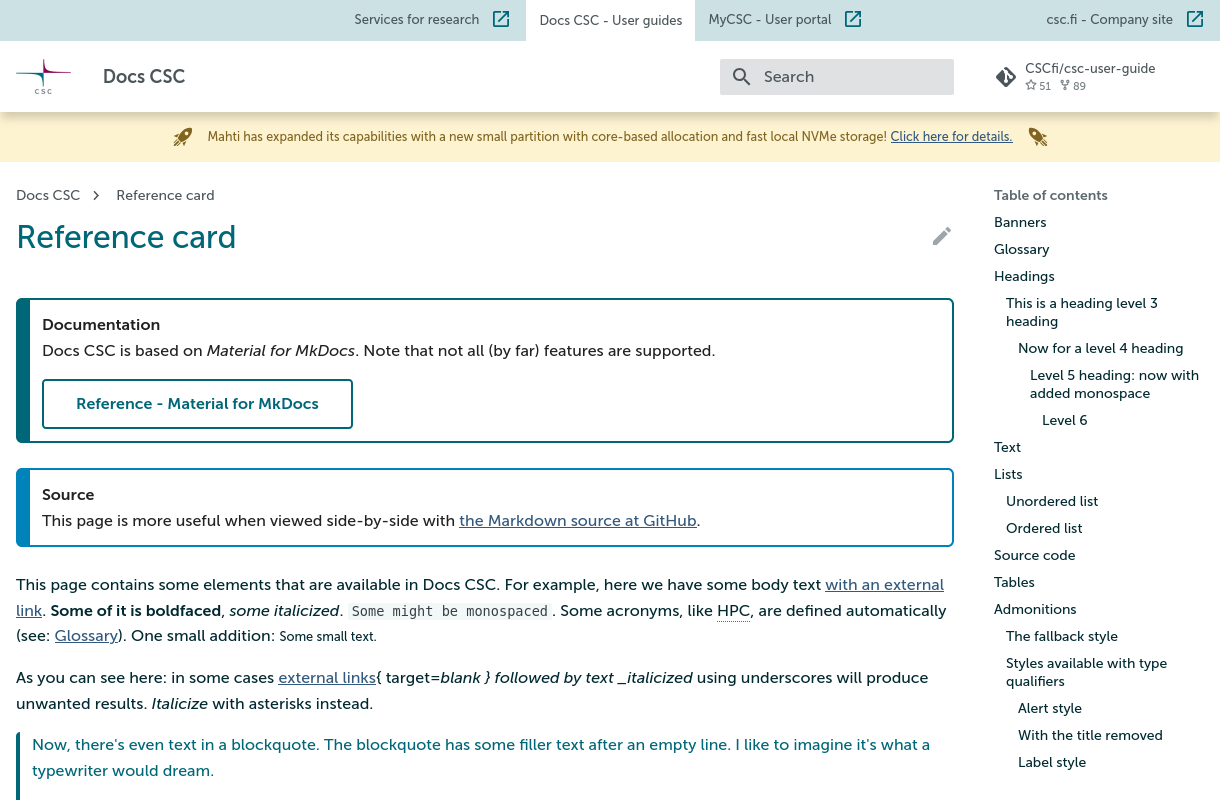
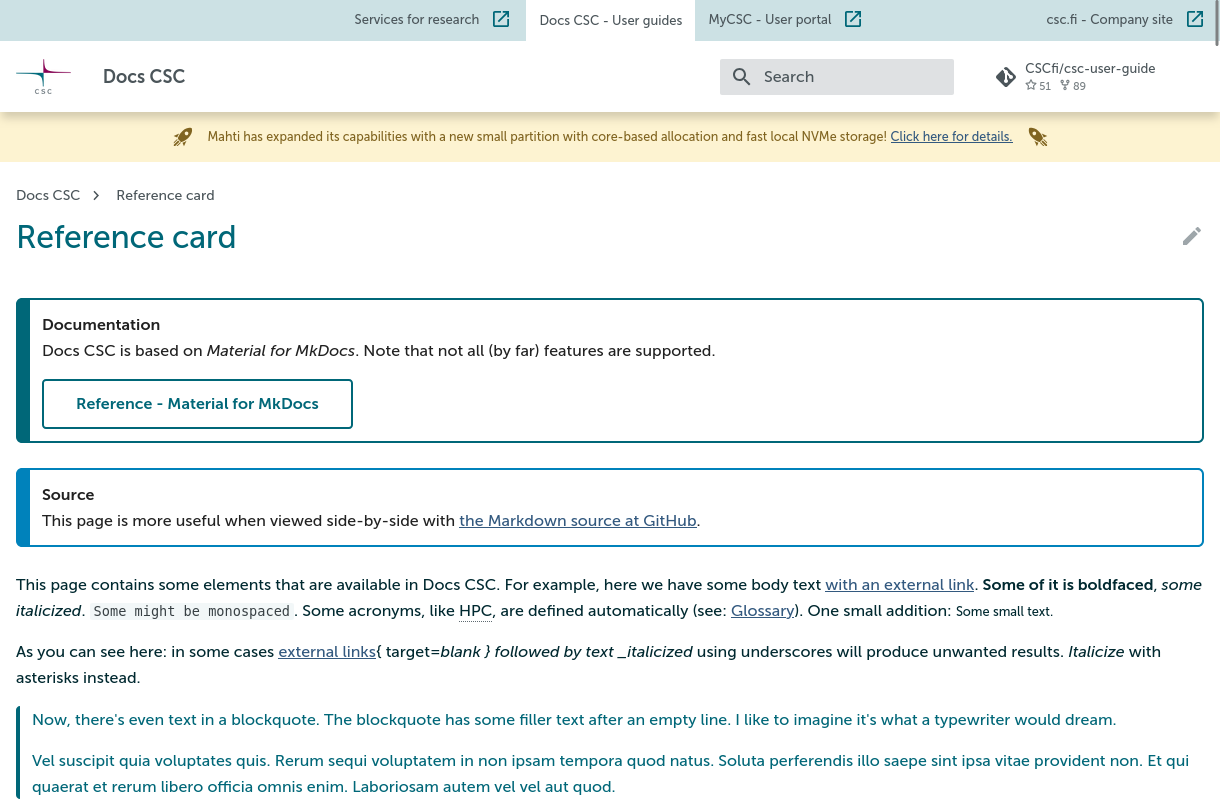
The sidebars on a particular page can be hidden by adding a hide property to the YAML front matter in the page Markdown source.
---
hide:
  - toc
  - navigation
---

# Title of the page

...
Here's a preview screenshot for each case:
!!! warning ""
Make sure that the breadcrumbs navigation at the top of the page is working correctly if hiding the navigation sidebar!
=== "Hide table of contents"
=== "Hide navigation"
=== "Hide TOC and navigation"
The table of contents may also be inserted arbitrarily on the page by simply adding the marker [TOC] in the Markdown source:
# Title of the page

## The table of contents

[TOC]


## The following heading

...The Grids feature from MaterialX for MkDocs is available in Docs CSC.
<div class="grid cards" markdown>

- :material-view-grid:{ .lg .middle } **Grids on Docs CSC**

    ---

    Here we go!

- :material-view-grid-plus:{ .lg .middle } **Another one**

    ---

    Yay!

</div>-
:material-view-grid:{ .lg .middle } Grids on Docs CSC
Here we go!
-
:material-view-grid-plus:{ .lg .middle } Another one
Yay!
<div class="grid cards" markdown>

- :material-dna:{ .lg .middle } **Accent**
  { .accent-card }

    ---

    Science!

- :material-information:{ .lg .middle } **Info**
  { .info-card }

    ---

    This.

- :material-check-circle:{ .lg .middle } **Success**
  { .success-card }

    ---

    Do!

- :material-alert:{ .lg .middle } **Warning**
  { .warning-card }

    ---

    Don't!

- :material-close-circle:{ .lg .middle } **Error**
  { .error-card }

    ---

    Why?!

</div>-
:material-dna:{ .lg .middle } Accent { .accent-card }
Science!
-
:material-information:{ .lg .middle } Info { .info-card }
This.
-
:material-check-circle:{ .lg .middle } Success { .success-card }
Do!
-
:material-alert:{ .lg .middle } Warning { .warning-card }
Don't!
-
:material-close-circle:{ .lg .middle } Error { .error-card }
Why?!